 9 Min
9 Min


Your call centre agents are like doctors. Most of the time, you don’t tell the doctor your exact illness. You simply describe your symptoms and trust the doctor to diagnose the problem and prescribe the right treatment.
Similarly, customers do the same thing. They tell your agents their inconveniences and trust them to solve their problems quickly.
Decision trees enable agents to efficiently diagnose and resolve customer problems by guiding them through a step-by-step process. This standardizes the quality of your customer service, ensuring consistency and accuracy.
In this blog, we are going to explore how you can easily create decision trees in google sheets for your support agents.
Table of contents
What is a Decision Tree?
A decision tree is a visual representation of standard operating procedures that your agents need to follow.
It breaks down complex process-flows into simple, next best actions.
This helps your agents to ask the right questions to customers, diagnose the problem faster, and solve it accurately.
12 Steps to Create a Decision Tree in Google Sheets
Step 1: Identify All the Use Cases
Identify all the processes for which you need to create a decision tree. For instance, handling customer complaints, product refunds, or order processing.
Step 2: Prioritize the Use Cases
Decide which use cases are more important and in which order you need to create the decision trees. Prioritization can be based on frequency of occurrence or criticality of the scenarios.
Step 3: Map Out the Workflow
Start by mapping out the workflow for your first use case. Add possible user responses, solutions, and guidance steps.
In this case, let’s take the use case of processing a product refund.
Step 4: Open Google Sheets
Open Google Sheets and create a new sheet. Name it appropriately, like “Decision Tree: Product Refund,” so it’s easy to find.
Step 5: Open the Drawing Window
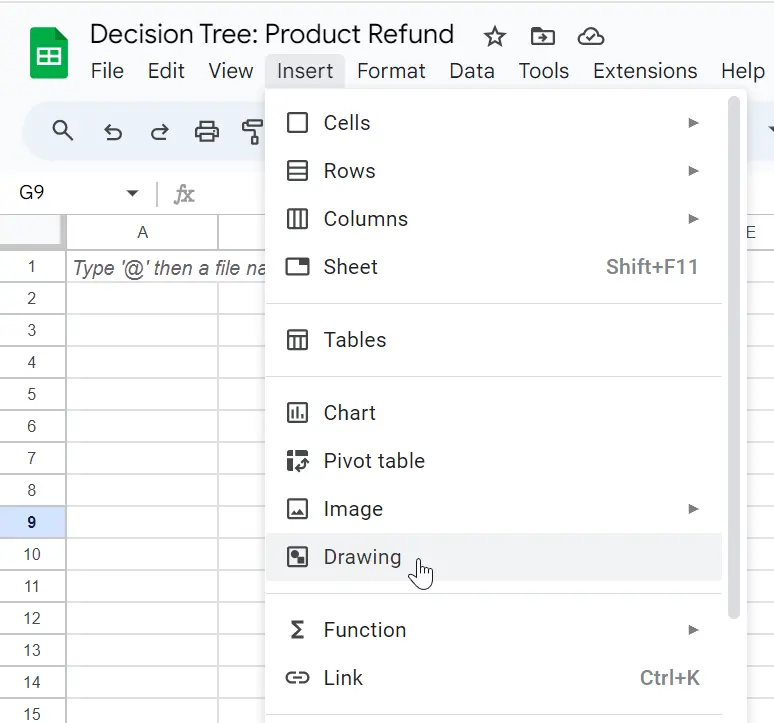
Click on the “Insert” tab in Google Sheets and choose the “Drawing” option from the drop-down menu. This will open a new drawing window.
Step 6: Insert Shapes
Start creating your flowchart by inserting shapes. Use rectangles for questions and guidance steps. Click on the “Shape” icon in the drawing window, select “Shapes,” and then choose the rectangle.

Step 7: Insert Text in Rectangles
Click on each rectangle and add the relevant questions, prompts, or actions that need to be taken.
Step 8: Add Colors for Clarity
Use color coding to differentiate the types of steps or actions in your decision tree. This visual distinction helps agents quickly understand the flow and make accurate decisions.
To fill a rectangle with color, click on the shape, then click on the paint bucket icon in the toolbar. Choose the appropriate color from the color palette.
Ensure that each type of step is consistently colored throughout the decision tree to maintain clarity and usability. For example, apply the following color scheme:
- Yellow – for questions or checks that the agent needs to ask or verify.
- Light Green – for positive responses or when the customer’s information is correct.
- Red – for negative responses or when the customer’s information is incorrect.
- Blue – for when the agent needs to deny a request or inform the customer of a negative outcome.

Step 9: Add Arrows
Arrows play an important role in directing the flow of the decision tree. Select “arrows” by clicking on the ‘Shapes’ icon.
Choose the arrow of your choice, edit the size, and place it appropriately across the decision tree.
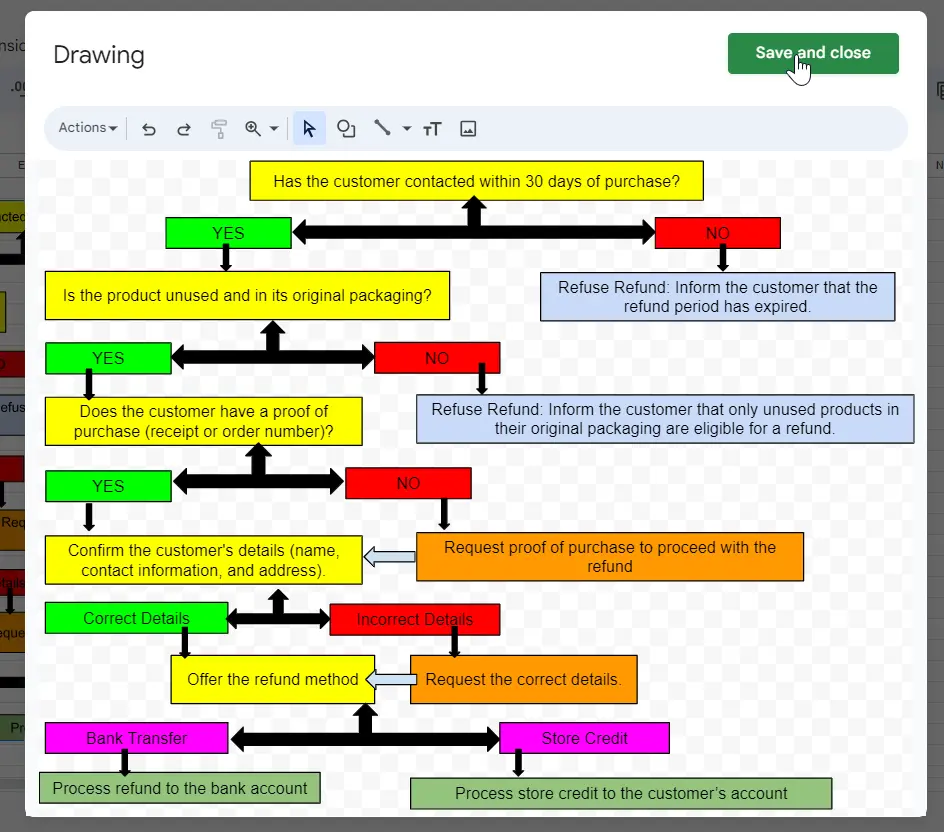
Step 10: Save the Decision Tree
Click on the “Save and Close” button in the top right corner of the drawing window. This will insert your decision tree into the Google Sheet.
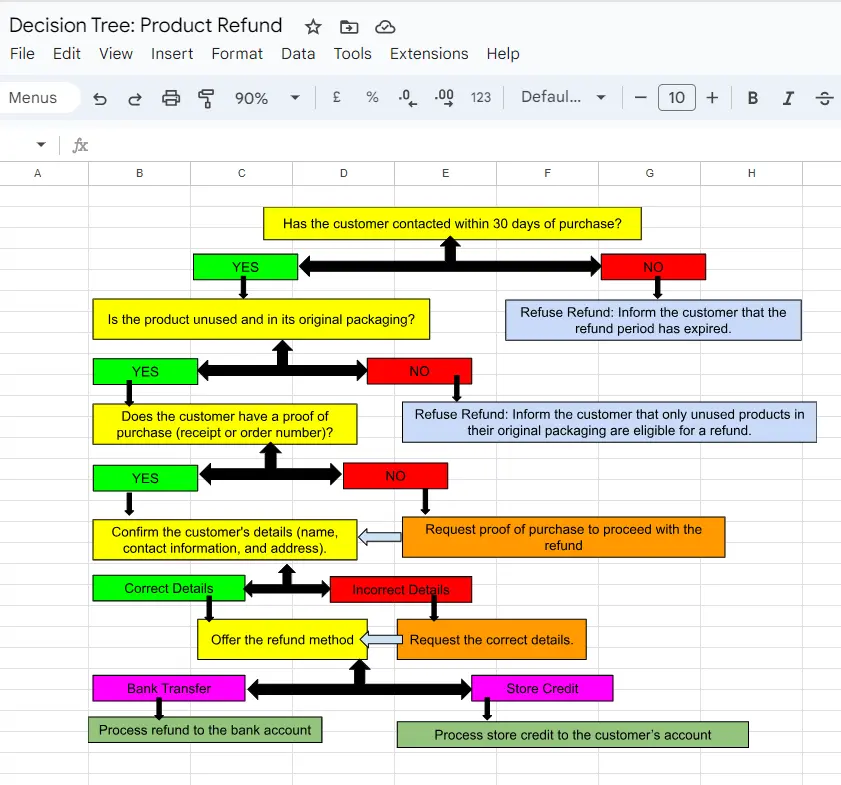
Step 11: Review the Decision Tree
Once you save and close the drawing window, you will see your decision tree appear in the Google Sheet.
Place it as you wish and carefully review it to ensure all steps and connections are accurate.
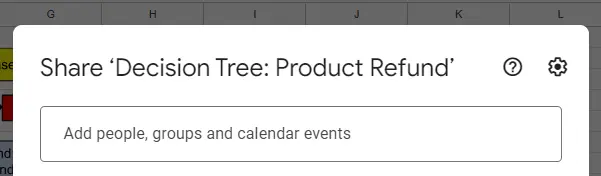
Step 12: Share the Decision Tree
Create a shareable link for the decision tree by clicking on the “Share” button in the top right corner of your Google Sheet.
Set the appropriate sharing permissions and distribute the link to all concerned agents or team members.
Create Decision Trees Effortlessly with Knowmax
Creating decision trees in Google Sheets is a good way to design workflows for simple customer queries with few decision points.
However, for complex queries with multiple decision points, a knowledge management system like Knowmax is more efficient.
With our latest AI tools, you can transform lengthy SOPs into decision trees within minutes. You can also create a new decision tree by just giving a simple prompt and then editing it as needed.


 Word Document)
 Excel File)


